
In a previous post, I discussed how to setup OAuth2 authorization in API Management using Azure Active Directory. This time I’d like to show something very similar, but using Azure AD B2C instead.
Once again, I’ll assume you already have an API implemented and configured in API Management. I’ll use the same PQR service I used last time as an example.
Step 1: Creating the B2C Sign-in Policy
Before we can integrate with Azure AD B2C, we need to create a new sign-in policy that we can use
to obtain a token later on. Using the Azure Portal AAD B2C module, I’ll create a new Sign-i policy
named b2c-apim-pqr supporting local accounts, as well as Facebook.
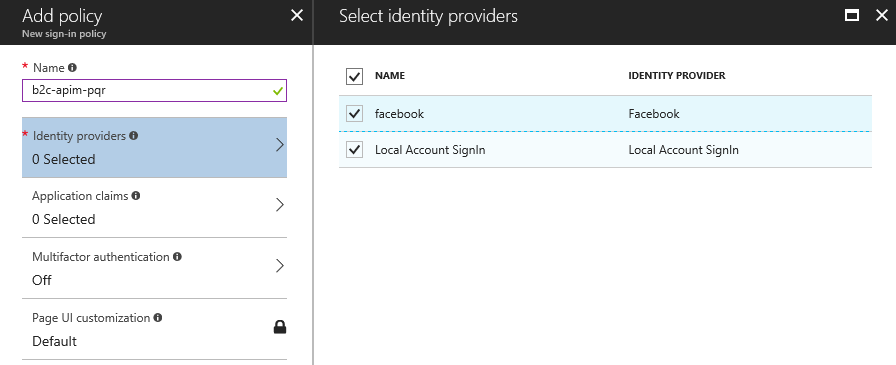
I also enable basic application claims to include in the token, such as first/last name and email addresses.
Step 2: Creating the applications
Like in the previous post, we need to create two applications of type Web App / Web Api. One
for our PQR API, and another for the API Management Portal instead. I’ll create the PQR API app first:

I’ll then create the portal application:
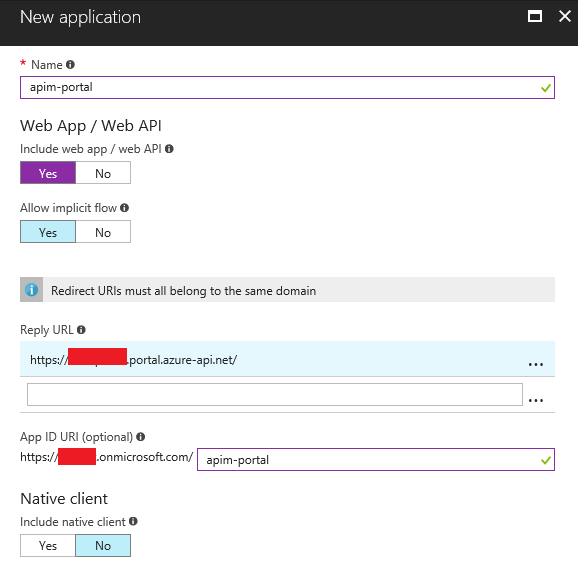
As usual, we’ll update the Reply URLs of the portal application once we create the authorization
server in API Management.
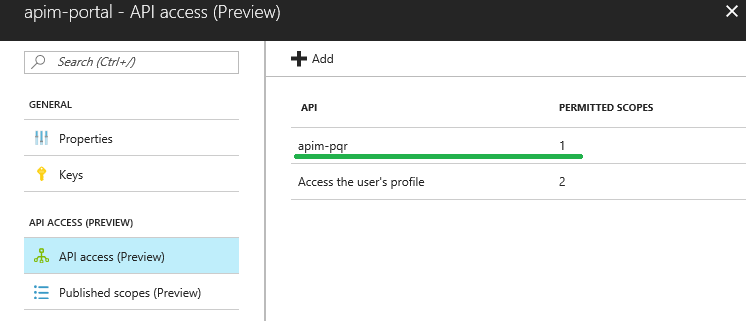
Now, I need to grant the portal application permissions to the api one:
I’ll also generate a new key for the portal application, and make note of both the ApplicationId,
as well as the new key.
Step 3: Creating the OAuth2 Authorization Server
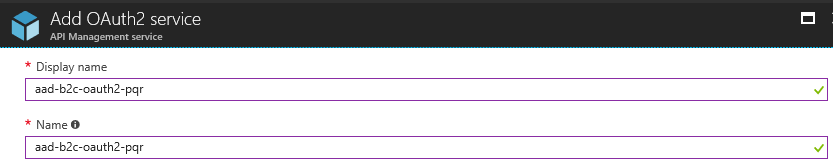
Back in API Management, it’s time to create our OAuth2 authorization server. This will be pretty much
the same as last time, with a few minor changes. I’ll call this aad-b2c-oauth2-pqr:
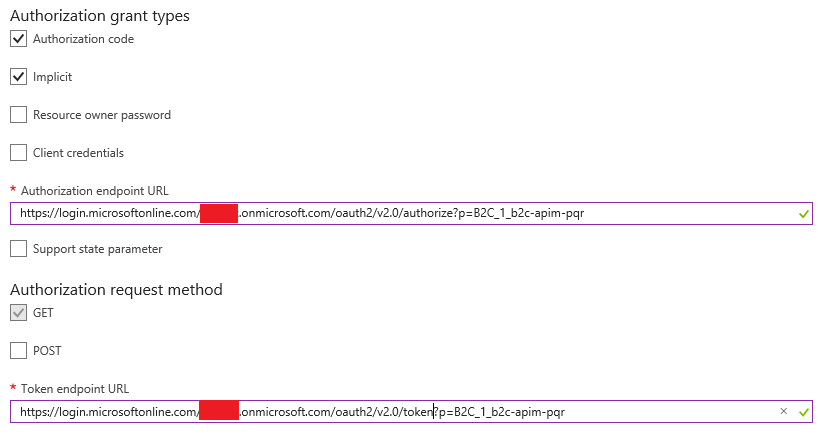
I’ll configure this to support both the Authorization code and Implicit grant types, and will
configure the authorization/token endpoint URLs to point to our new B2C sign-in policy. Notice that both the
authorization and token endpoint URLs use the same format used by the normal Azure AD OAuth2 flow,
but with the sign-in policy name in the p query string parameter
I’ll also add the resource parameter to point to the apim-pqr application we created in the first step:

Finally, I need configure the client id and secret based on the application id and key for the apim-portal
application I created in step 1.
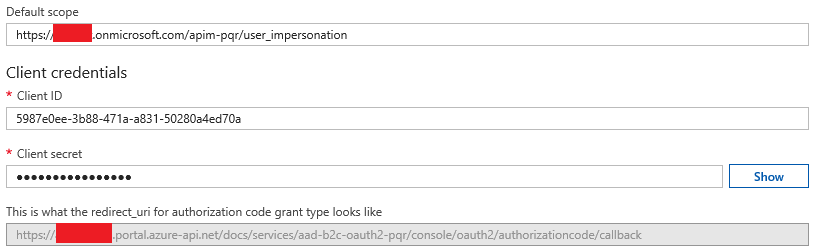
With B2C, we also need to provide a default scope, otherwise obtaining the token will fail. Here we use the scope to ask for
user_impersonation(delegation) to theapim-pqrapplication.
By this point, I’ll also have the redirect_uri for our API Management OAuth2 service, so I’ll copy
this value and add it as a valid Reply URL in the apim-portal application.
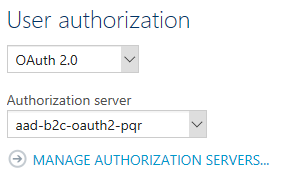
Step 4: Configure the API
Now I’ll setup my PQR API in API Management to require authorization using the new OAuth2 configuration:
Again, I’ll add a policy to the API that validates the token:
<policies>
  <inbound>
    <validate-jwt
        failed-validation-error-message="Unauthorized. Access token is missing or invalid."
        failed-validation-httpcode="401"
        header-name="Authorization">
      <openid-config url="https://login.microsoftonline.com/{tenant}/v2.0/.well-known/openid-configuration?p=B2C_1_b2c-apim-pqr" />
        <required-claims>
          <claim name="aud">
            <value>f498336e-d99f-xxxx-xxxx-22e3f7d87e56</value>
          </claim>
        </required-claims>
      </validate-jwt>
    <base />
  </inbound>
  <backend>
    <base />
  </backend>
  <outbound>
    <base />
  </outbound>
  <on-error>
    <base />
  </on-error>
</policies>
The only interesting bits here is that the openid-config element should point to
the OpenId metadata endpoint for our Sign-in policy, and the audience of the generated
token will use the Application Id rather than the App ID URI.
Now, I should be able to obtain a token from the Developer Portal for my API and test the API:

