
In my last post, I outlined a customer scenario for protecting an API through OAuth2 in Azure API Management. I mentioned in it that I had been unsuccessful at using OpenId Connect, rather than raw OAuth2.
After some more testing, and some help, I was able to get this working, and wanted to share how I did it.
Once again, I’ll assume you already have an API implemented and configured in API Management. I’ll use the same PQR service I used last time as an example.
Step 1: Creating the Azure AD Application
The first step is to create the Azure AD application. In this case, we will not be creating 2 separate applications like last time; we only need one.
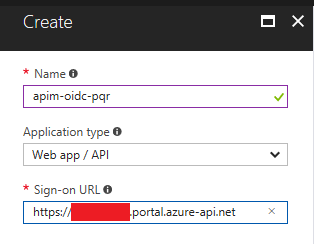
In the Azure Portal, I’ll go over to my Azure AD instance and add a new application registration.
I’ll call this one aad-oidc-pqr:
After creating the application, there are a few things we need to change:
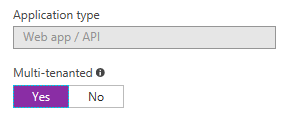
- We need to mark the application as multi-tenant. Otherwise, the developer portal in API Management}
will not work correctly, and you will get an error similar to
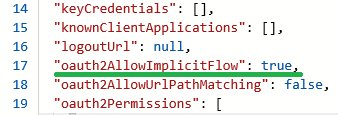
AADSTS70001: Application 'xxxxx-xxxxx-xxxxx-xxxxx' is not supported for this API version. - (Optional) Enable the OAuth2 implicit flow.
We can use the application properties window to mark the application as multi-tenant:
To enable the OAuth2 implicit flow, we need to edit the application manifest:
Now, copy the application ID, and generate a new Key for the application. Make a note of both as we will need these in a moment. We’ll come back later to the application to configure the reply URLs.
Note: Another alternative is creating the Azure AD app as a converged application, but I was only able to make it work with the implicit grant flow.
Step 2: Configure OpenId Connect Authorization
Back in API Management, we can configure a new OpenId Connect Authorization service.
Using the Azure Portal, we will find this under the OpenId Connect option, and in the
Publisher Portal it will be under Security -> OpenId Connect.

For this part, we’ll need:
- The OpenId Connect metadata for our Azure AD tenant, which will be in the form
https://login.microsoftonline.com/{tenant}/.well-known/openid-configuration. - The id of the Azure AD application we created in step 1
- The matching key for the application
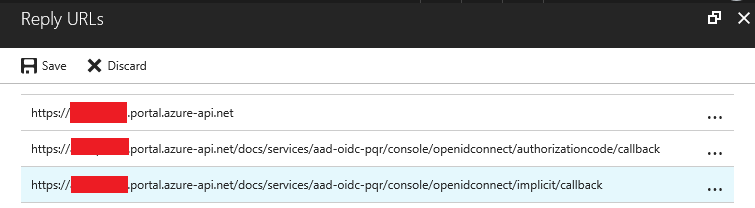
Once we’ve created the OpenId Connect Authorization Service in API Management, we need to go back to the Azure AD Application, and add both the authorization code grant and implicit grant redirect URIs to the Reply URLs collection of our application:
Step 3: Configure API
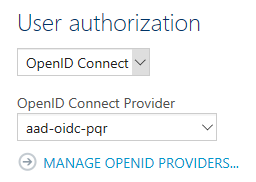
Just like in my previous post, I need to configure my PQR API to require OpenId Connect authorization:
And again, I want to setup a policy on my API to validate the JWT token:
<policies>
  <inbound>
    <validate-jwt
        failed-validation-error-message="Unauthorized. Access token is missing or invalid."
        failed-validation-httpcode="401"
        header-name="Authorization">
      <openid-config url="https://login.microsoftonline.com/{tenant}.onmicrosoft.com/.well-known/openid-configuration" />
      <required-claims>
        <claim name="aud">
          <value>24f98265-c230-4668-a40b-11aa1b02c29c</value>
        </claim>
      </required-claims>
    </validate-jwt>
    <base />
  </inbound>
  <backend>
    <base />
  </backend>
  <outbound>
    <base />
  </outbound>
  <on-error>
    <base />
  </on-error>
</policies>
This is exactly the same as last time, only that when using OpenId Connect,
the audience in the token will contain the Application Id, rather than the
App ID URI of the Azure AD application.
Step 4: Test!
At this point, we should be able to use the API Management Developer portal to test that OpenId Connect works with our API:

