
This is part 3 of my series of articles on implementing a custom Logic Apps connector. Read part 1 and part 2.
By this point, I’ve implemented and deployed the WebApi application that implements the custom connector, and configured the necessary applications and permissions in Azure Active Directory. It’s time to create the custom connector itself.
A Logic Apps custom connector is an Azure resource of type Microsoft.Web/customApis. I’m unsure how
much of the creation of such a resource can be automated through ARM or other tools, so I’ll create
it manually for now.
Step 1: Create the resource
The first step is to create the new resource of type Logic Apps Connector:

Then provide the following information:
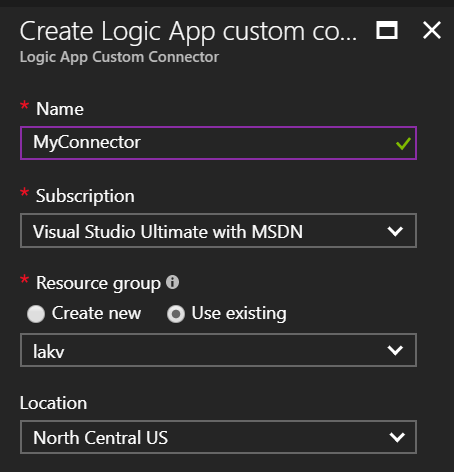
A couple of details that are important here:
- The name of the custom connector resource is important. By default, this is the name you will see in the Logic Apps designer when you try to use it. I have not found a way, so far, of customizing it after creation.
- The Azure region you choose is important. You will only be able to use the connector from Logic Apps created in the same region.
Step 2: Configuring the connector
Once the custom connector is created, open the resource and click the Edit button
at the top. That will open the editor where we can define the connector information,
security configuration, and the connector operations.
The easiest way to start is by uploading an existing OpenApi (Swagger) definition for your connector. As I mentioned in Part 1 of the series, I already customized the Swagger generation in the connector code so that it can be used quickly.
So I’ll start by pointing the connector to the Swagger definition:

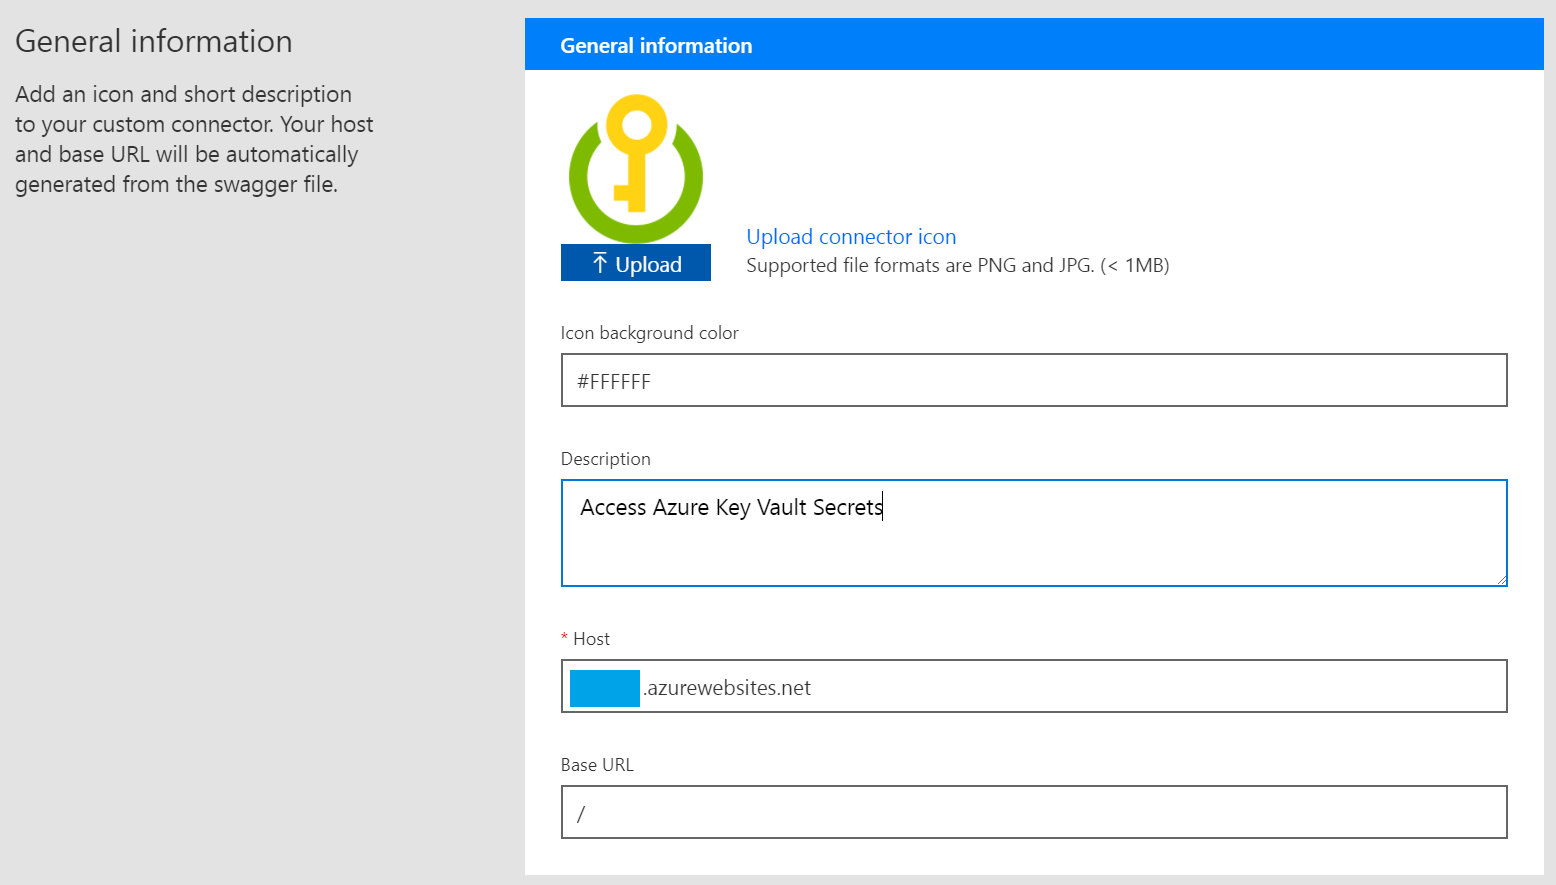
This will initialize the connector operations and other information. Then, we can add an icon, background color, description, and the base URL where the connector WebApi is located:
After clicking the Continue button, we’ll move to the security section. Here,
Logic Apps recognizes that our connector needs OAuth2 authentication. We need to
click the Edit button at the bottom and customize it by adding:
- Client Id: This is the
Application Idof ourKeyVault Connector Clientapplication we created in Azure AD. - Client secret: This is the key we generated for the application.
- Scope: This is the App ID URI of our
KeyVault Connectorapplication. The PowerShell script I presented in the part 2 will register this ashttps://[tenant-domain]/[appname]:
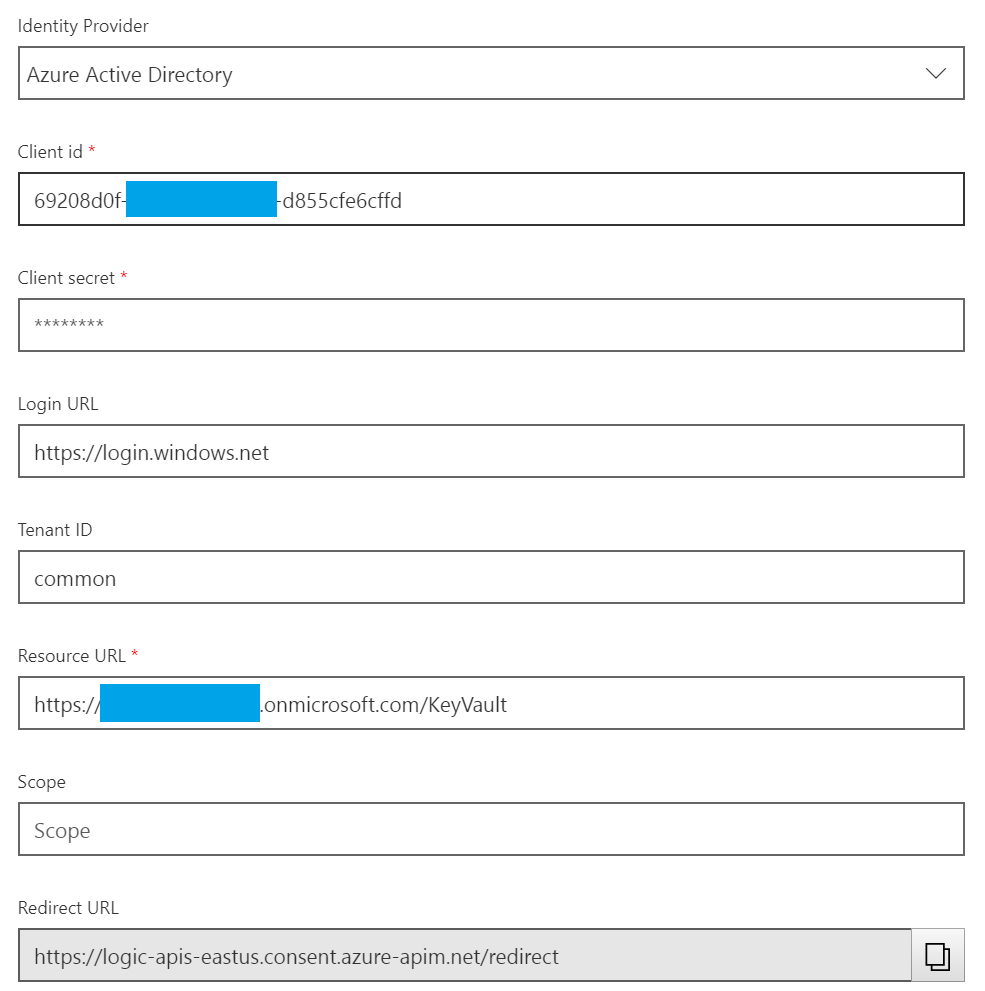
Notice here the Redirect URL field. This will be empty until we update the connector.
We’ll discuss this in a moment.
Again, we click the Continue button to move to the final tab (Definition). Here,
you can customize the definition of the operations that are implemented by the connector.
We don’t need to customize anything here for now, as our original Swagger definition
already works as is.
To complete creation of the connector, press the Update Connector button at the top!
Step 3: Update the redirect URI
Now that the connector is fully defined, go back to the Security tab and find out the
value for the Redirect URL field. Since I created the connector in the East US region,
it ends up being https://logic-apis-eastus.consent.azure-apim.net/redirect.
We will copy this value, and use it to update the Reply URL for the KeyVault Connector Client
application in Azure AD:
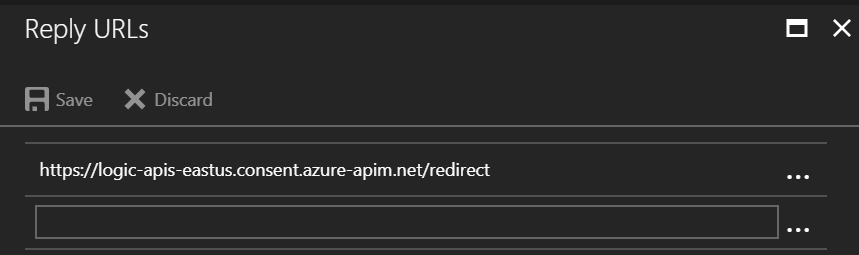
Notice that we update the URL on the client application used by Logic Apps to initiate the authentication flow, not on the connector application, as the later should always point to the deployment URL for the WebApi.
This step is very important, because otherwise authentication will not succeed for our application.
Step 4: Test it
Now we’re ready to test our connector!
Let’s create a new Logic Apps, and use it:
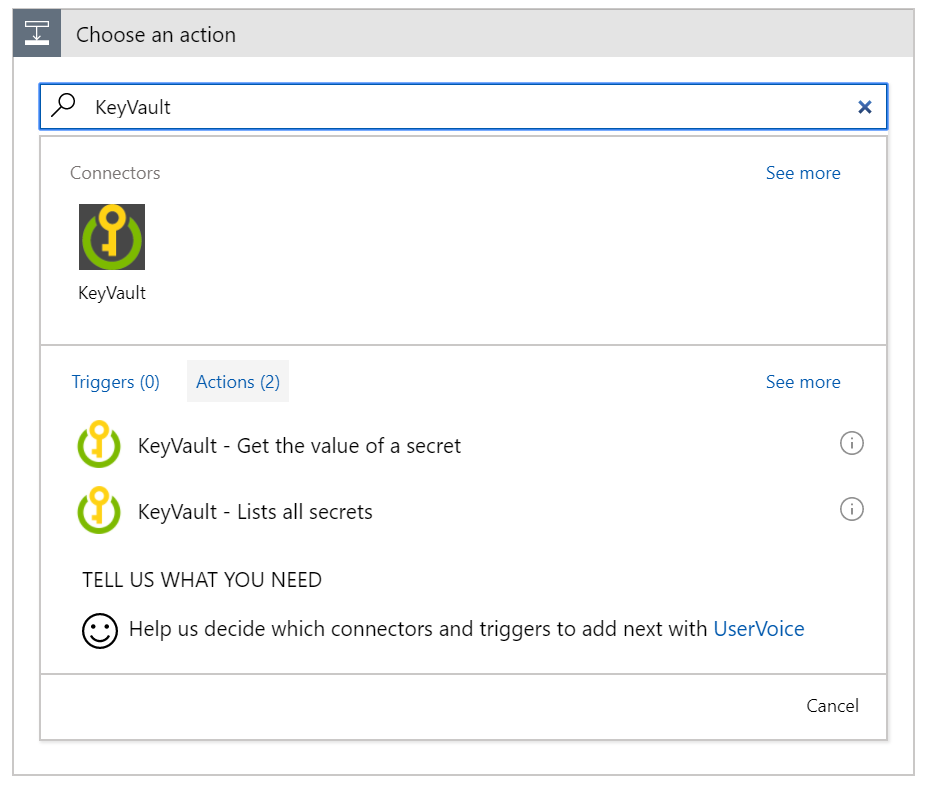
Let’s select the ‘Get the value of a secret’ operation, and we’ll get the big button:

This will open the popup window to login to an Azure AD account that has been granted permissions to access Azure Key Vault secrets, and then trigger the consent flow:
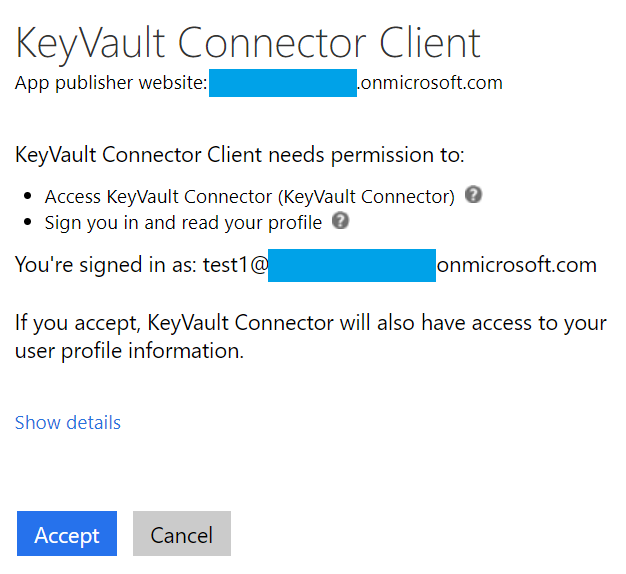
After accepting and completing the login successfully, we should be able to enter the values for the arguments in our operation.
Note: I’ve noticed that after this, the connection will be created successfully, but often the operation UI will not be displayed. Instead, you will go back to the bit
Loginbutton. If this happens, delete the operation from the Logic App and add it again, and it should appear correctly right away.I am not sure at this time if this ia bug or if something in how I configured the application triggers it.

Something that I’ve found a bit annoying here is that the new connection resource is created with a display name equal to the Azure AD account you used to sign in.
Now we can test our Logic App and see if our connector worked. For my sample app,
I chose to expose the Logic App flow to a Request trigger and use the Response
action to return the Body of our operation as a response. Calling
the Logic App using Postman, we get an answer back similar to this:
{
    "version": "12f5899bd95c4f66af0ec45a6f17c04e",
    "value": "MyValue",
    "id": "https://xxxxxxxx.vault.azure.net/secrets/MySecret/12f5899bd95c4f66af0ec45a6f17c04e",
    "name": "MySecret",
    "contentType": "text/plain"
}
Success!
Final Thoughts
In this final post in the series we learned how to create a custom Logic App connector and test it in a new Logic App. There are lots of customizations and other minor issues to make it workable, but hopefully it provides an initial idea of what it takes to implement a custom connector.
