
In part 1 of this series of posts, I introduced the idea of implementing a custom Logic Apps connector as a way to get familiar with the challenges involved. The initial part revolved around the ASP.NET Core WebApi implementation.
In this second part, I’d like to discuss a bit about setting up the Azure AD credentials.
The first step is to create the two Azure Active Directory applications we need. For both applications, we want to create an application key (secret) for authentication.
The first application is for our WebApi application, so it should be setup with the URL of the WebApi as the reply URL, and I also wanted to mark it as multi-tenant.
The second application is what Logic Apps will use to authenticate the user. It should also be a Web / WebApi application.
The docs say that the reply URL for this should be set to
https://msmanaged-na.consent.azure-apim.net/redirect, however this is not correct.We won’t know the right reply URL until we actually configure the custom connector resource later on. For now, we’ll leave it to this default value and update it later.
To simplify creation of these two applications, I built a simple PowerShell script:
[CmdletBinding()]
param(
  [Parameter(Mandatory=$true)]
  [String]$applicationName,
  [Parameter(Mandatory=$true)]
  [String]$apiAppName,
  [Parameter(Mandatory=$true)]
  [String]$tenantDomain
)

Import-Module AzureRm

function New-Password {
  $rng = New-Object System.Security.Cryptography.RNGCryptoServiceProvider
  [byte[]]$buffer = new-Object byte[] 32
  $rng.GetBytes($buffer, 0, $buffer.Length)

  return [Convert]::ToBase64String($buffer)
}

# Create the Web Api application
$baseUrl = "https://${apiAppName}.azurewebsites.net/"
$appId = "https://${tenantDomain}/$applicationName"

$app = New-AzureRmADApplication -DisplayName "$applicationName Connector" `
                                -HomePage $baseUrl `
                                -IdentifierUris $appId `
                                -ReplyUrls $baseUrl `
                                -AvailableToOtherTenants $true

$applicationKey = New-Password
$credential = New-AzureRmADServicePrincipal -ApplicationId $app.ApplicationId -Password $applicationKey

[PSCustomObject]@{
  Application = "WebApi Connector";
  ApplicationId = $app.ApplicationId;
  ApplicationKey = $applicationKey
}

# Create the client application that will be used by LogicApps
$clientAppId = "https://${tenantDomain}/${applicationName}-connector"
$clientKey = New-Password
$clientApp = New-AzureRmADApplication -DisplayName "$applicationName Connector Client" `
                                      -HomePage "https://login.windows.net" `
                                      -IdentifierUris $clientAppId `
                                      -ReplyUrls "https://msmanaged-na.consent.azure-apim.net/redirect"


$clientCredential = New-AzureRmADAppCredential -ObjectId $clientApp.ObjectId -Password $clientKey

[PSCustomObject]@{
  Application = "Client";
  ApplicationId = $clientApp.ApplicationId;
  ApplicationKey = $clientKey
}
The script takes the following arguments:
- applicationName: The base name you want to use for both applications. If I pass
KeyVaulthere, I’ll end up with two applications calledKeyVault Connector(for the WebApi) andKeyVault Connector Client(for the Logic Apps client). - apiAppName: The name of the API App in App Service that hosts the connector. I use this to configure the reply URL of the WebApi application.
- tenantDomain: The name of your Azure AD tenant such as
mydomain.onmicrosoft.com.
Output of the script would be something like this:
Application      ApplicationId          ApplicationKey
-----------      -------------          --------------
WebApi Connector 06086c51-09a1-48b3-... <secret>
Client           681d64cf-0d99-4f5c-... <secret>
Now we have all the data we need to configure this in our API App and the Logic Apps connector.
Granting Permissions
Now we need to setup the right permissions on our applications. This step is not easy to automate in PowerShell, so I did it by hand.
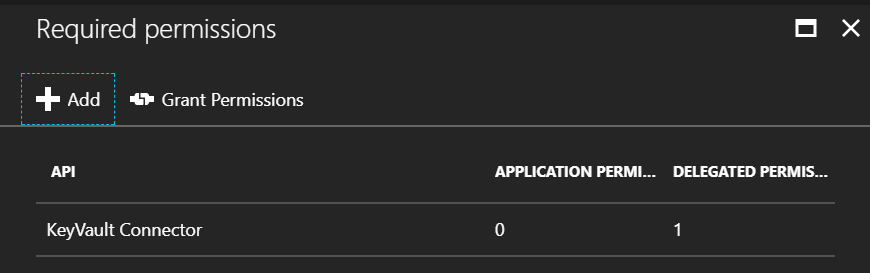
First part is granting the KeyVault Connector Client (client application) permissions
to call the KeyVault Connector (WebApi) application:
- Go into Azure AD, find the
KeyVault Connector Clientapplication - Select the Required Permissions option in the menu
- Click the
+ Addbutton - Select the
KeyVault Connectorapplication as the target - Check the box next to the
Access KeyVault Connectoroption.

The second part is to repeat this process, but granting permissions to the
KeyVault Connector application to access the Azure Key Vault service principal.

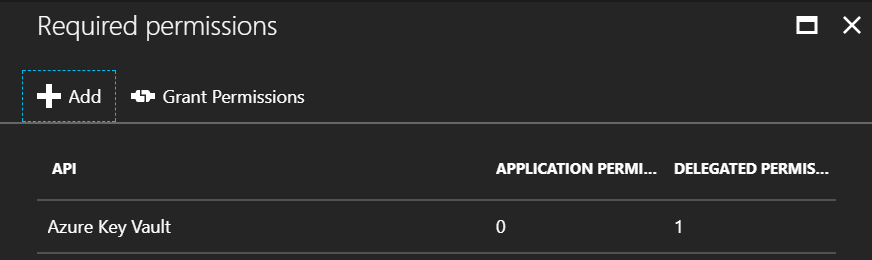
Once done, make sure to click the Grant Permissions button. Otherwise, you will
get a AADSTS65001: The user or administrator has not consented to use the application...
error when attempting to call the connector later on.
Key Vault Permissions
While on the topic of permissions, make sure the Azure AD user you plan to use later on to create the connection to the connector from a Logic App has permissions in the Key Vault to access secrets.
Next Steps
In the next post in the series, I’ll register the Logic Apps Custom Connector and update the client application settings in Azure AD.
