Azure SQL now supports setting up Transparent Data Encryption while bringing your key encryption keys. This is easy to setup in the Azure Portal, but I wanted to try setting this up in an automated manner, preferably leveraging ARM templates as much as possible.
This turned out to be a bit more complex than I expected, but totally doable. Here are the necessary steps:
The ARM templates for this post can be found on GitHub.
Creating the Key
When using the BYOK (bring your own key) feature, you need to store your encryption key in an Azure Key Vault. So let’s first create one:
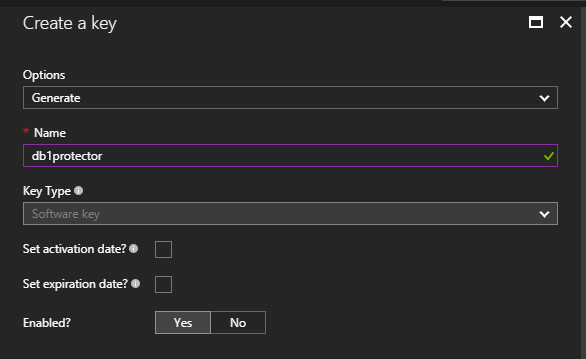
- In the Azure Portal, locate your Key Vault
- Click on the
Keysicon - Click the
+ Addbutton - Select the
Generateoption, the name, and other required properties - Click the
Createbutton to complete the process

You could do the same in a script with an Azure CLI command like the following:
az keyvault key create --vault-name $vaultName --name $keyName --size 2048 --protection software
Once you’ve created the key, make sure to grab the name of the current version of the key. You can do this in the portal, or by using the command line:
az keyvault key show --vault-name $vaultName --name $keyName --query key.kid
The URI returned will be something similar to
https://<vault_name>.vault.azure.net/keys/<key_name>/<key_version>. We’re interested in
the last segment.
Deploying the Server
The next step is to use an ARM template to deploy the Azure SQL Server resource. At this point, we are not actually creating the TDE protector, as we need to do something else first.
Here’s the core of the template to create the server:
{
    "name": "[parameters('sqlServerName')]",
    "type": "Microsoft.Sql/servers",
    "location": "[resourceGroup().location]",
    "apiVersion": "2015-05-01-preview",
    "dependsOn": [],
    "tags": {
        "displayName": "SQL Logical Server"
    },
    "identity": {
        "type": "SystemAssigned"
    },
    "properties": {
        "administratorLogin": "[parameters('sqlServerAdminLogin')]",
        "administratorLoginPassword": "[parameters('sqlServerAdminLoginPassword')]"
    }
}
The interesting bit here is the identity property. When we set it to SystemAssigned, SQL
will go to the Azure Active Directory Tenant associated with the Azure Subscription
and create a new Service Principal named RN_<serverName>.
This principal will be setup with X509 certificate credentials for authentication. I’m unsure at this point if it’s possible to create this Service Principal manually, as it would simplify things somewhat.
Once the server is created, we’ll see this identity reflected in the resource properties:

While we’re at it, let’s create a new database on the server, and enable TDE.
The latter is done by creating a nested resource of type transparentDataEncryption:
{
    "name": "[parameters('sqlDbName')]",
    "type": "databases",
    "location": "[resourceGroup().location]",
    "apiVersion": "2014-04-01-preview",
    "dependsOn": [
        "[resourceId('Microsoft.Sql/servers', parameters('sqlServerName'))]"
    ],
    "tags": {
        "displayName": "SQL DB"
    },
    "properties": {
        "collation": "[parameters('sqlDbCollation')]",
        "edition": "[parameters('sqlDbEdition')]",
        "maxSizeBytes": "1073741824",
        "requestedServiceObjectiveName": "[parameters('sqlDbRequestedServiceObjectiveName')]"
    },
    "resources": [
        {
            "comments": "Transparent Data Encryption",
            "name": "current",
            "type": "transparentDataEncryption",
            "apiVersion": "2014-04-01-preview",
            "properties": {
                "status": "Enabled"
            },
            "dependsOn": [
                "[parameters('sqlDbName')]"
            ]
        }
    ]
}
At this point, TDE will be enabled on the new Database using the default Server Managed encryption key.
Granting Key Permissions
Once the new Azure SQL Server has an identity in Azure Active Directory, we need to grant permissions to that entity to fetch our encryption key from Key Vault. We can use a command like the following to grant it permissions to get, wrap, and unwrap our encryption key:
objectId=`az sql server show --resource-group $rg --name $sqlserver --query identity.principalId | sed -e 's/^"//' -e 's/"$//'`
az keyvault set-policy --name $vaultName --object-id $objectId --key-permissions get wrapKey unwrapKey
Creating the Protector
Now we can go back to ARM, and create the TDE protector. For this, we need to create 2 separate resources:
Server Key
First, let’s create a new server key from the Key Vault. All we need for this is the name of the server, the key vault, the key name and version. From the last 3, we need to compute a couple of things:
{
    "variables": {
        "serverKeyName": "[concat(parameters('keyVaultName'), '_', parameters('keyName'), '_', parameters('keyVersion'))]",
        "keyUri": "[concat('https://', parameters('keyVaultName'), '.vault.azure.net/keys/', parameters('keyName'), '/', parameters('keyVersion'))]"
    }
}
The serverKeyName variable contains the name of the server key we’ll create; this needs to be
in the specific format vaultName_keyName_keyVersion. The keyUri variable is just to avoid
having to add an extra parameter to the template with duplicated information.
Now we can create a keys resource, like this:
{
    "name": "[concat(parameters('sqlServerName'), '/', variables('serverKeyName'))]",
    "type": "Microsoft.Sql/servers/keys",
    "apiVersion": "2015-05-01-preview",
    "dependsOn": [
        "[parameters('sqlServerName')]"
    ],
    "properties": {
        "serverKeyType": "AzureKeyVault",
        "uri": "[variables('keyUri')]"
    }
}
All we really need to specify here is the key type (AzureKeyVault) and the URI of the
key in Key Vault.
Rotating the Protector
Now we can rotate the protector by setting the “current” encryptionProtector resource on
the server to the new server key.
{
    "name": "[concat(parameters('sqlServerName'), '/current')]",
    "type": "Microsoft.Sql/servers/encryptionProtector",
    "kind": "azurekeyvault",
    "apiVersion": "2015-05-01-preview",
    "dependsOn": [
        "[resourceId('Microsoft.SQL/servers/keys', parameters('sqlServerName'), variables('serverKeyName'))]"

    ],
    "properties": {
        "serverKeyName": "[variables('serverKeyName')]",
        "serverKeyType": "AzureKeyVault"
    }
}
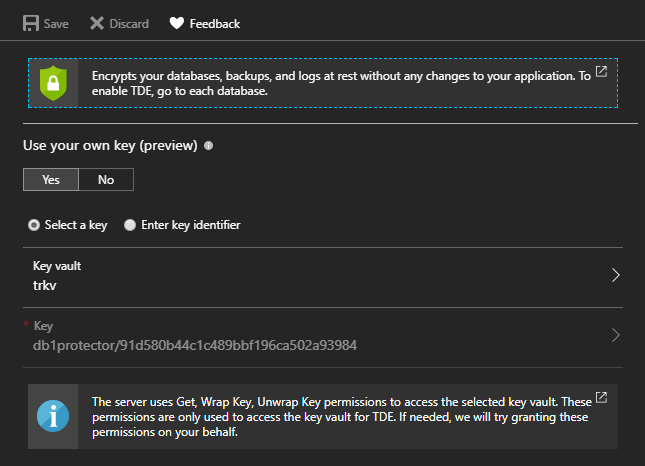
If we go into the portal and check the TDE settings for the SQL Server, we should see it is indeed configured to use Key Vault at this point:
