
In a previous post, I discussed how to authenticate to an Azure SQL database from a Web Application (running in Azure App Service) using an Azure Active Directory Service Principal. For this I used a certificate stored in Key Vault to authenticate the principal and obtain a token I could present to SQL.
You can find the updated code for this post on GitHub.
In this post, let’s expand this a bit further: I will add authentication support to the Web Application by federating through OpenId Connect to Azure Active Directory, and then delegate the user credentials all the way to the database.
Configure new users in SQL
Since I want to allow other Azure AD users to connect to the database, I need to grant them permissions to it.
To do this, I just follow the steps we used in my previous post, and use the T-SQL commands:
- Create the user:
CREATE USER [user@tenant] FROM EXTERNAL PROVIDER - Grant permissions:
ALTER ROLE
Setting up the AD Application
So far, I’ve been using an Azure Active Directory Service Principal to authenticate to SQL. In order to be able to setup OpenId Connect on our Web App, I also need an Azure AD application to go with it.
So what I want is to configure my existing Service Principal so that I can use it for this purpose as well.
Note: using a separate AD application registration won’t work because doing the
On_Behalf_Ofdelegation will fail.
To do this, I’m going to open the Azure AD portal and find the
Service Principal in the App Registrations section of the portal.
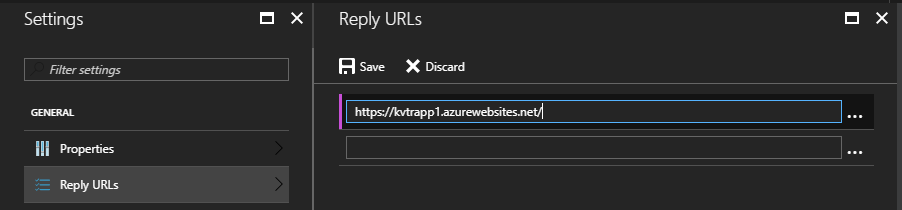
Here, I open the Reply URLs page and add the application host (i.e. https://<app>.azurewebsites.net/):
Granting Sign-In permission
For users to be able to sign-in, I need to give the application
the right permissions. I do this by opening the
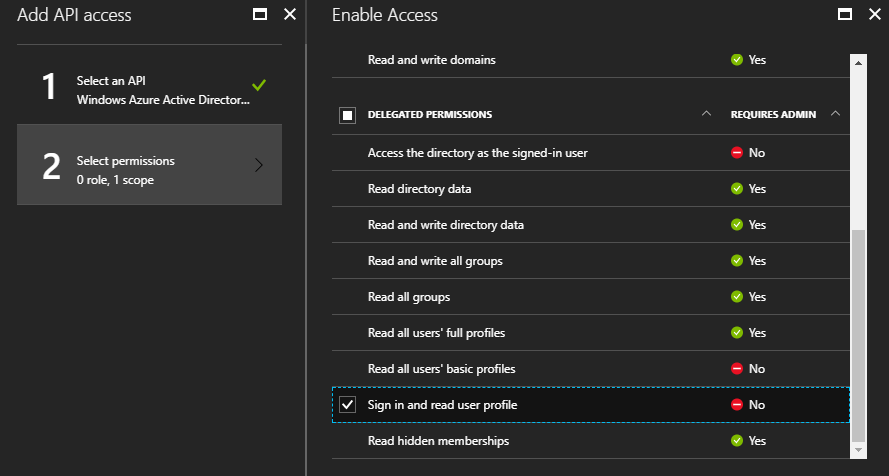
Required permissions page, and clicking on the + Add button.
Here, I select Windows Azure Active Directory (Microsoft.Azure.ActiveDirectory) as
the API, and check the “Sign in and read user profile” option under
“Delegated Permissions”:
Then click save and confirm all changes.
Granting Access to SQL
There is one other permission that I need to grant to the application,
so that we can delegate credentials to SQL Server.
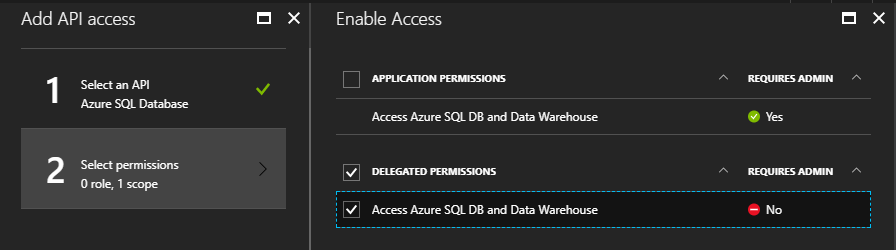
Again, click on the + Add button, and select Azure SQL Database as the API.
Then, check the “Access Azure SQL DB and Data Warehouse” option under the
“Delegated Permissions” section:
Then save all the changes.
As a final step, I locate the Application Id property in the
application properties; we’ll need this value in a moment.
Enabling Authentication
Now I can enable federated authentication. I could do this by leveraging the Easy Authentication feature in App Service, but since I’ll need to change the application code later on, I’ll do this in code just as easy.
First, let’s add references to the following NuGet packages into the project:
- Microsoft.Owin.Host.SystemWeb
- Microsoft.Owin.Security.OpenIdConnect
- Microsoft.Owin.Security.Cookies
Now I can write our startup code to enable authentication:
using Microsoft.Owin.Security;
using Microsoft.Owin.Security.Cookies;
using Microsoft.Owin.Security.OpenIdConnect;
using Owin;
using System;
using System.Configuration;

namespace UsingTokenAuthApp
{
    public class AuthConfig
    {
        public static void RegisterAuth(IAppBuilder app)
        {
            var clientId = ConfigurationManager.AppSettings["APP_CLIENT_ID"];
            var tenant = ConfigurationManager.AppSettings["AAD_TENANT_ID"];

            var authority = $"https://login.microsoftonline.com/{tenant}";

            app.SetDefaultSignInAsAuthenticationType(CookieAuthenticationDefaults.AuthenticationType);
            app.UseCookieAuthentication(new CookieAuthenticationOptions());

            var options = new OpenIdConnectAuthenticationOptions
            {
                Authority = authority,
                ClientId = clientId,
            };
            app.UseOpenIdConnectAuthentication(options);
        }
    }
}
This is obviously a very minimal implementation, but enough for my needs.
Note: Configure the
APP_CLIENT_IDvalue inappSettingsto theApplication Idvalue I copied from the Service Principal properties in the previous step.
I also want to force every request to be authenticated, so I’ll add
a global AuthorizeAttribute filter:
public class FilterConfig
{
    public static void RegisterGlobalFilters(GlobalFilterCollection filters)
    {
        filters.Add(new AuthorizeAttribute());
    }
}
Obtaining delegated Credentials
Now that the user can be authenticate by the application, I want to change how the access token is obtained.
I’m going to create a separate method for this:
public static async Task<String> GetDelegatedTokenAsync(ClaimsPrincipal user)
{
    var context = new AuthenticationContext(Authority);
    var certificate = FindCertificate(CertSubjectName);
    if (certificate == null)
        throw new InvalidOperationException("Could not load certificate");

    var id = (ClaimsIdentity)user.Identity;
    var bootstrap = id.BootstrapContext as BootstrapContext;
    var credential = new ClientAssertionCertificate($"http://{ServicePrincipalName}", certificate);

    var userAssertion = new UserAssertion(bootstrap.Token);
    var result = await context.AcquireTokenAsync(SqlResource, credential, userAssertion);
    return result.AccessToken;
}
The code is very similar to the original, except I obtain the
JWT token of the current user and use that to create a UserAssertion object
that I provide to AcquireTokenAsync.
Note: This is not production-ready code. Besides needing additional error handling, we also need to cache the access tokens by providing a proper
TokenCacheimplemenation. Some discussion on this can be found here.
By default, ClaimsIdentity.BootstrapContext will be null. To fix this,
I need to modify the Web.config file to tell the identify framework to
save the JWT token of the user during login:
<system.identityModel>
    <identityConfiguration saveBootstrapContext="true" />
</system.identityModel>
Now let’s put this code to use:
public async Task<ActionResult> UsingDelegation()
{
    var user = this.User as ClaimsPrincipal;
    var token = await ADAuthentication.GetDelegatedTokenAsync(user);

    String cs = ConfigurationManager.ConnectionStrings["SqlDb"].ConnectionString;
    var sqlUser = await GetSqlUserName(cs, token);

    ViewBag.SqlUserName = sqlUser;
    return View("DelegatedContext");
}
Testing the application
After deploying all the changes, I am ready to test this. I navigate to
the application’s home page (https://<app>.azurewebsites.net/) and I should
be redirected to the Azure AD login page. Here I provide credentials for
a valid user.
Once logged in, I navigate to the Credential Delegation page (/home/UsingDelegation).
If you’re trying this yourself, you might get an error similar to:
{
    "error":"invalid_grant",
    "error_description":"AADSTS65001: The user or administrator has not consented to use the application with ID 'http://TestSpWithCert'. Send an interactive authorization request for this user and resource.\r\nTrace ID: 48285e18-5e24-48a3-98b3-93027d392700\r\nCorrelation ID: 08cd347f-117e-412d-9a63-b2fc533fef22\r\nTimestamp: 2017-08-31 18:32:48Z",
    "error_codes":[65001],
    "timestamp":"2017-08-31 18:32:48Z",
    "trace_id":"48285e18-5e24-48a3-98b3-93027d392700","correlation_id":"08cd347f-117e-412d-9a63-b2fc533fef22"
}
This means you forgot to grant permissions to your application to access SQL Server in Azure AD.
If everything was setup correctly, however, I should see my user credentials delegated to SQL server without problems:

Conclusion
Doing credential delegation to Azure SQL DB through Azure Active Directory opens up interesting options, such as taking advantage of row-based security or better use of Data Masking in SQL.
Hope you found this series of articles useful!
